
As you embark on your video content marketing on Youtube, you’ll want to setup a Channel. Like a TV channel, its the location of your videos and which users can Subscribe to. Subscribers will be your most valuable part of video marketing, they’re your enthusiasts who’ve opted into stay informed of your video uploads.
Step 1: Create or Sign into your Google Account.
If you’re setting up a new Google account, go through the new Google+ account registration. New Youtube Channels will be created with a Google+ account, since early 2014 these two services are heavily interdependent.
Step 2: Create Channel Start
Once signed in, go to Youtube.com and in the upper right click on your icon. Below your icon, you can switch between accounts (your person and your page). Your connected Google+ page shows up here, and here it will show “Create Channel” under the page name.
Then you get prompted for which account to use YouTube as, choose the “To use a business or other name, click here”.
Name your channel, pick a category, and choose the appropriate viewer group restriction.
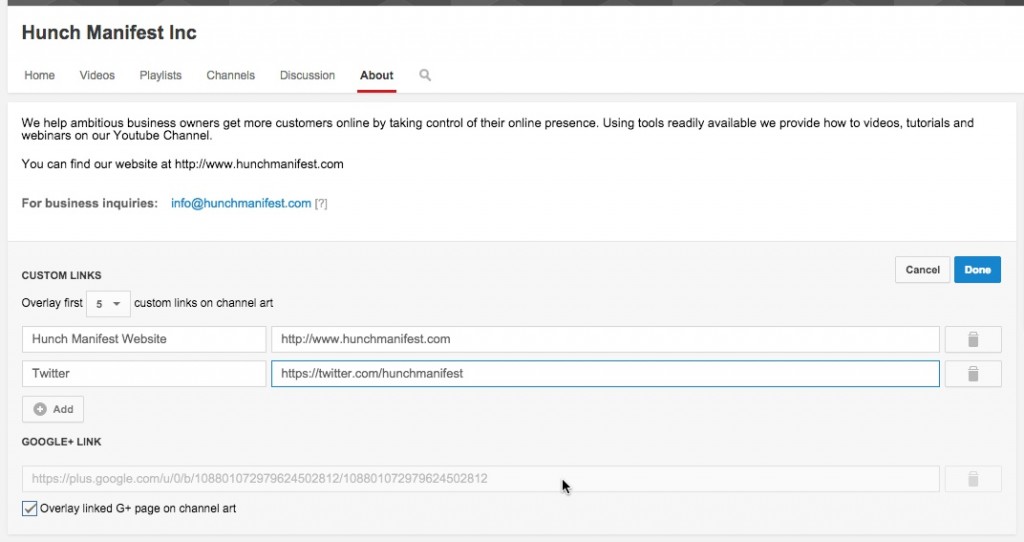
Step 3: Update your About page
Add description of your channel and business. Enter an email address for business inquiries (not shown to bots so spam shouldn’t be a problem). Then, add links, one to your website and possibly to other secondary pages like twitter. Below you can see how we updated our information.
Step 4: Update Channel Icon and Channel Art
You should try to prepare two photos, the first is your channel icon, the other is the channel art. The icon will show up many places, with your videos, on your channel page, beside your comments to name a few. This is a smaller photo thats linked from your Google+ account. You can edit the icon on Google+ and after a few minutes it will show on your channel.
Chanel Art is the hardest part of setting up a channel. These have to be very large images, they recommend “for optimal results on all devices we recommend uploading a single 2560 X 1440 px“. Since Youtube is on every device, you’re uploading one image optimized for TVs, Phones, Laptops, Tablets, etc. There is actually only a small portion in the middle that is safely shown on all devices. It took me a couple tries with a basic editor to get our basic photo showing up on each device. Here you can see the preview screen for our Channel Art. For a image template (showing borders of whats visible) as well as the latest guidance see the Channel art help page.
If you’re still with me after this, great job! You’re now ready to start uploading your content! Here’s how our page shows up to the public now, I especially like those links to our website on the right hand side.


