
Once you have a list of subscribers to your newsletter and some engaging content, its time to send your first email campaign. This tutorial assumes that you already possess a MailChimp account. To set yours up today, check out our blog post here.
Step 1: Create a new campaign
From the main menu, navigate to the Campaigns Page. Click the Create Campaign button in the top-right corner to select the type of Campaign you’d like to create.

Step 2: Set up the campaign
On the Recipients step, select the list or segment of a list that you’d like to send your campaign to. On the Set Up page, you can name your campaign and edit your email subject. From here, you can also select options on how the email will be tracked. We recommend tracking opens and clicks as it gives insight into the level of engagement of your email campaigns.
Step 3: Select a Template
Mailchimp offers several different ways for you to edit the template of your email campaign:
- A Basic template and Theme allows you to use the drag and drop feature
- Saved Templates allow you to select from any templates you’ve previous saved or imported
- Saved Campaigns let you reuse one of you recently sent or draft campaigns
- The Code Your Own option gives three ways to import a campaign layout from outside of Mailchimp
Using a Basic Template is a good idea if you are sending out your first campaign and don’t have a previous template to work off of. You can fully edit the content and design of the template from here.

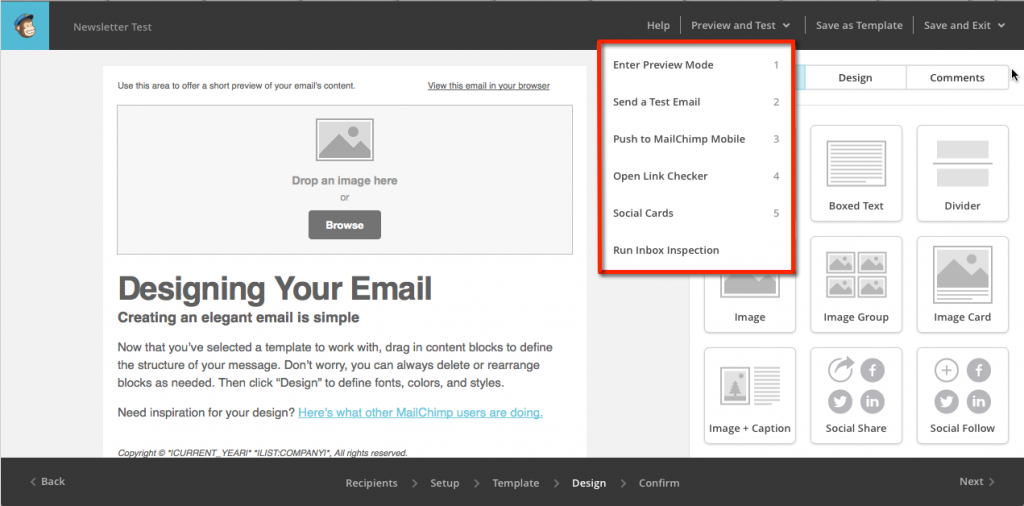
Step 4: Preview
Once you are satisfied with your design and content, you can preview the newsletter or send a test email from the Preview and Test tab in the navigation bar. Sending a test email will show you exactly what your email will look like when it is sent out.

When you’re ready to send your newsletter, review the Pre-Delivery Checklist on the Confirm step. Mailchimp will notify you of any errors that need to be fixed before you can send your email. Click Resolve to navigate directly to the step to fix the error.
When you’re finished, you can either Send your newsletter right away or Schedule it to be sent at a later date.
Tips for Sending Better Email Campaigns:
1. Customize your subject
Your subject is what determines whether your readers open the email or not. Be creative and make it personal to your brand or message.
2. Create cutom header graphics
Using large images as the header of your email will grab your reader’s attention right away.
3. Take a look at your reports after your campaigns
Gathering results through trackable links and having access to real-time reports will help you understand what works and what doesn’t.